Reading Notes #458

Every Monday, I share my "reading notes". Those are a curated list of all the articles, blog posts, podcast episodes, and books that catch my interest during the week and that I found interesting. It's a mix of the actuality and what I consumed.

You think you may have interesting content, share it!


The suggestion of the week

  • Using Azure Key Vault to manage your secrets (Chris Noring) - Wow, this is a very complete post that explains with Azure Key vault is great and it also explains how to build a simple n\Node.js app to read a value from it.

Programming

Miscellaneous

Reading Notes #457

Every Monday, I share my "reading notes". Those are a curated list of all the articles, blog posts, podcast episodes, and books that catch my interest during the week and that I found interesting. It's a mix of the actuality and what I consumed.

You think you may have interesting content, share it!

Cloud

Programming

Miscellaneous

Reading Notes #456


The suggestion of the week

Cloud

Programming

Podcasts

Miscellaneous


~Frank

How to Create a Continuous Integration Continuous Deployment (CI-CD) Solution for a Docker Project


I'm not a Docker master, but I understand that it's very useful and I like to use it from time to time in some projects. Another thing I like is DevOps and automation and in a project I have, I was missing that. In the previous setup, the container was built and publish to DockerHub with the date as a tag. Nice but not very easy to now with versions are "stable" and wish one are "in progress".

This post is about how I build a continuous integration and continuous deployment solution for my docker project. All the code is on GitHub and Docker Hub. I sharing my journey so others can enjoy that automation and not spend a weekend building it.

The Goal

By the end of this build, there will be two GitHub Action to build and publish a different version of the application on Docker Hub.

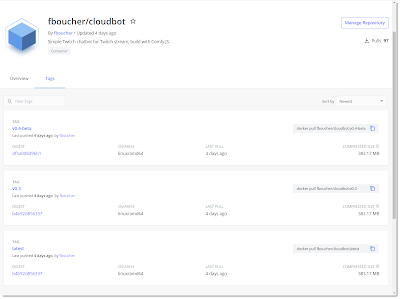
The release version: every time a release is published on GitHub a container tag with the matching version number will be built and published. (ex: myapp:v1)

The beta version: At every push in my branch on GitHub a container will be published with a specific tag. The tag will be matching the draft release version number with -beta. (ex: myapp:v2-beta).

In this post, the application is a Node.js Twitch chatbot. The type of application is not important the post focus on the delivery.

Publishing the release version

Every time a release is published on GitHub, the workflow will be triggered. It will first retrieve the "release version" then build and tag the container with it and finally publish (aka push) it to Docker hub. Because a "release" is also a "stable" version it will also update the container tag latest.

Let's look at the full YAML definition of the GitHub Action and I will break it down after.

name: Release Docker Image CI

on:
  release:
    types: [published]
jobs:
  update:
    runs-on: ubuntu-latest
    steps:
    - uses: actions/checkout@v2
    - name: Set outputs
      id: vars
      run: echo ::set-output name=RELEASE_VERSION::$(echo ${GITHUB_REF:10})
    - name: Publish to Registry
      uses: elgohr/Publish-Docker-Github-Action@master
      with:
        name: ${{secrets.DOCKER_USER}}/cloudbot
        username: ${{ secrets.DOCKER_USER }}
        password: ${{ secrets.DOCKER_PASSWORD }}
        tags: "latest,${{ steps.vars.outputs.RELEASE_VERSION }}"

To limit how many times the workflow is triggered I used on: release and the type: published, adjust as you like.

The next interesting part is the lines in the step vars.

- name: Set outputs
    id: vars
    run: echo ::set-output name=RELEASE_VERSION::$(echo ${GITHUB_REF:10})

Here I use the environment variable GITHUB_REF (striped of the 10 first characters contains "refs/tags/") to initialize a local variable RELEASE_VERSION. The value is available from the outputs of that step, like on the last line of the YAML.

tags: "latest,${{ steps.vars.outputs.RELEASE_VERSION }}"

From the steps identified by the id vars I retrieved from the outputs the value of RELEASE_VERSION.

In this GitHub Action, I used elgohr/Publish-Docker-Github-Action@master because it was simple and was doing what I need. You can execute docker commands directly if you prefer or use the docker/github-actions.

There are many options available from the GitHub marketplace.

Publishing the beta version

Every time a push is done on GitHub, the workflow will be triggered. It will first retrieve the "release version" of the most recent release in draft mode. The workflow will happen -beta to the retrieved version and use this to tag the container. Finally, publish (aka push) it to Docker hub.

Once more, here full YAML, I will break it down after.

name: Build Docker Images
on: [push]
jobs:
  build:
    name: cloudbot-beta
    runs-on: ubuntu-latest
    steps:
    - id: last_release
      uses: InsonusK/get-latest-release@v1.0.1
      with:
          myToken: ${{ github.token }}
          exclude_types: "release, prerelease"
          view_top: 1  
    - uses: actions/checkout@v2
    - name: Publish to Registry
      uses: elgohr/Publish-Docker-Github-Action@master
      with:
        name: ${{secrets.DOCKER_USER}}/cloudbot
        username: ${{ secrets.DOCKER_USER }}
        password: ${{ secrets.DOCKER_PASSWORD }}
        tags: "${{ steps.last_release.outputs.tag_name }}-beta"

Here the difficulty was that I wanted to create a tag from a "future" version. I decided to use the Draft Releases because those are not visible by everyone, therefore they look like the future.

If your last release is version 1 (v1.0), to make this workflow possible you will need to create a new release and save it in Draft.


Like in the Release workflow, I need to retrieve the version. Because drafts are only visible to some people we will need to get access. This is easily done by using a github.token. Those are created automatically when the GitHub Action starts.

Then using the step InsonusK/get-latest-release we will retrieve the version.

- id: last_release
    uses: InsonusK/get-latest-release@v1.0.1
    with:
        myToken: ${{ github.token }}
        exclude_types: "release, prerelease"
        view_top: 1  

This time when passing the value for the tag we will concatenate "-beta" to it.

tags: "${{ steps.last_release.outputs.tag_name }}-beta"

Wrapping Up

And voila, a very simple and easy to implement ci-cd for a container project. There are many different options, looking forward to learning how you did yours?

Reading Notes #455


The suggestion of the week


Cloud


Programming


Miscellaneous

Reading Notes #454


Cloud


Programming


Podcast


Books


Every Tool's a Hammer: Life Is What You Make It
 

(Adam Savage) 

- I really liked this book. In fact, As I was reading the first chapter I was "earing" Adam's voice. So instead of creating that voice in my head I bought the audiobook and let Adam himself tells me his story. This is the best book I listen to this year. It was inspiring and empowering.

Reading Notes #453


Cloud

Programming

Miscellaneous

Podcasts

  • What is a Developer Game Jam? (Coding Blocks) - Interesting episode about Game Jam... I barely know that universe. Yes, I said universe because it is a completely different world or better another dimension. There are tons of events and participants but you may never hear of that. It's very interesting.

  • A Blast from the Past and Life's Interesting Journey — Back After 8 Years (The Smart Passive Income Online Business and Blogging Podcast) - Inspiring episode about how communities can be built and be interesting.

How to configure a secured custom domain on a Azure Function or website

I wanted to create this tutorial for a long time. How to map a naked domain on an Azure resource. It looks so complicated, but once you know what to do it's kind of simple in fact. In this post, I will share the three simple steps to do exactly this.

Step 1: Add Custom Domain


The first step is to map a domain on the application. The method I will explain uses a "www" domain (ex: www.fboucher.dev). To map directly a naked domain (ex: fboucher.dev) you would need to buy a wildcard certificate. However, I will show you in step three how to walk around this issue by using DNS rules.

From the Azure portal, open the Azure Function or App Service. From the left menu search for "custom", click the Custom domains option. In this panel click the button Add custom domain, and enter your www domain.


Click the validate button and follow the instruction to make the connection between the App Service and your domain provider.

Step 2: Adding a Certificate


Now that your custom domain is mapped, let's fix the "not secure" warning by adding a certificate. From the Azure portal return in the App blade. Repeat the previous search for "custom", and select the option TLS/SSL settings. Click the Private Key Certificates, and the Create App Service Managed Certificate button. Select the domain previously added and saved. It will take a few moments to create the certificate.


Go back in the Custom domains blade and click the Add binding button. Select the domain and certificate, don't forget to select the SNI SSL option and click the Add Binding button.


Step 3: Create the DNS Rules

Create an account in cloudflare.com and add a site for your domain. We will need to customize the DNS and create some Page Rules.


On the cloudflare.com note the 2 nameservers addresses. Go to the origin name provider (in my case godaddy) and replace the names of the nameservers with the value found on cloudflare.


Create a rule that will redirect all the incoming traffic from the naked-domain to www.domain. On the option on the top, click the Pages Rules (B). Then Click the Button Create Page Rule


In the field for If the URL matches: enter the naked-domain follow by /*. That will match everything coming from that URL

For the settings select Forwarding URL and 301- Permanent Redirect. Then the destination URL should be https://www. with your domain and /$1.


References

🔗 Map an existing custom DNS name to Azure App Service: https://c5m.ca/customDomain 

🔗 Secure a custom DNS name with a TLS/SSL binding in Azure App Service: https://c5m.ca/tls-ssl

Reading Notes #452


Cloud


Programming


Miscellaneous